Training on our shells takes the form of an orientation which takes about 2 1/2 hours. Request Training Here
If all goes well in your orientation, you’ll be permitted to row solo along the waterfront towards Crissy Field and the Warming Hut. Or go out rowing with others in a double or a quad. We encourage you to come down and practice several times in the following weeks, and reinforce what you’ve learned while it’s still fresh.
But there’s still a lot to learn about our waters – tides, currents, shipping, and other safety matters. Other club rowers can help mentor you as you gain in confidence.
Certification is the level at which the club trusts you know what you’re doing. Certified rowers may row away from shore solo. To become certified:
- Have made six rowing outings – solo, with others, or in doubles/quad.
- Demonstrate falling out and getting back into your shell.
- Review the Bay Safety Guide, and pass the test.
- Go for a checkout row with a certified shell rower. You will plan the trip, and if everything goes well, you’ll be certified at the end of the outing.
To row our shells or coastal boats, it helps if you are already comfortable with rowing. If you’re coming from rowing the Dolphin Club’s wooden boats, it’s a good idea to improve your technique on our Spirit Whitehalls or on Quad outings in preparation for the transition to shells. These boats use standard length oars, and have the standard spread between oarlocks.
If you’ve previously sculled at another club, you’ll probably pick up rowing with us fairly quickly. But there’s still a lot for you to learn on Bay Safety and the peculiarities of our dock. Familiarize yourself with our Rowing Path and you’ll still need to go through certification where you’ll be tested to take a boat out anywhere you want on the Bay by yourself.
The Boats
Boats in this fleet include:
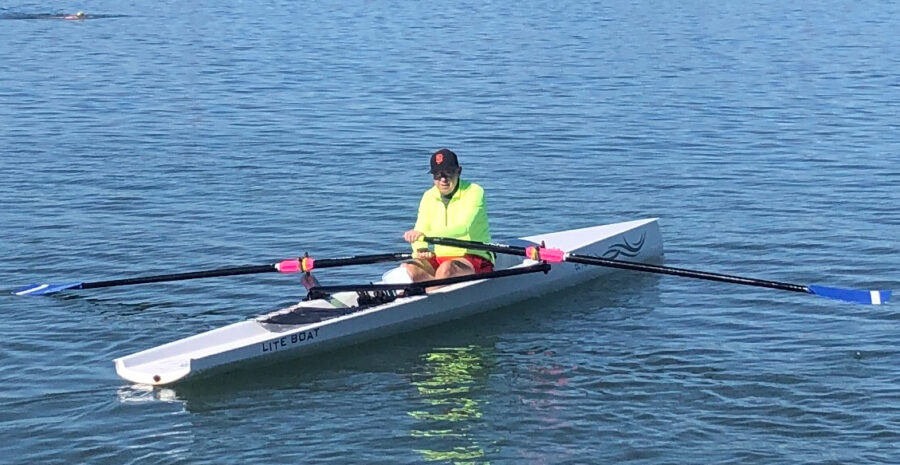
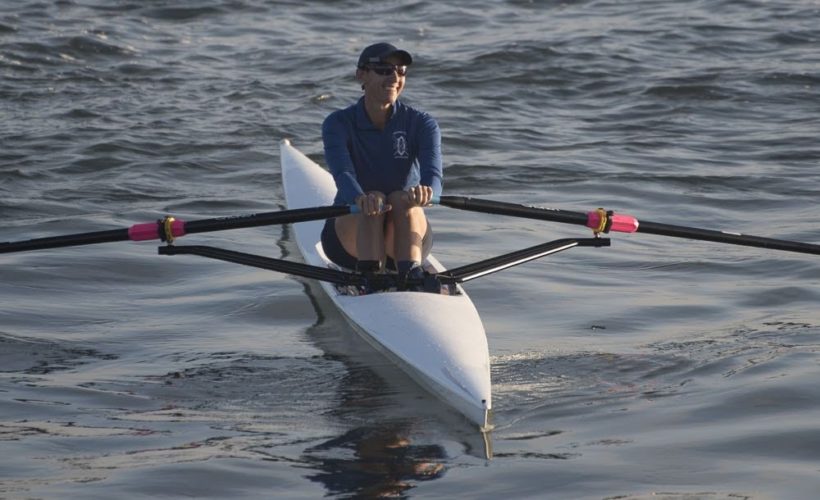
Coastal LiteBoats
These are a new design of open-water rowing shell. They are fairly stable, and well suited to the rougher waters like San Francisco Bay. The single Liteboats are El Niño and La Niña. These boats are good for getting started with shell rowing.
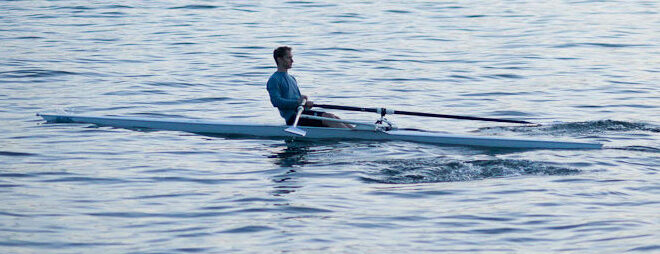
Maas Shells
These open water rowing shells have been highly popular and well proven as open-water rowing shells on San Francisco Bay for many years. They are a good next step once you’re comfortable with the LiteBoats. The 21′ aeros (Tern and Banana) are more stable than the 24’s (Coot, Pelican and Surf Scoter)
What to Wear
For rowing shells, you’ll typically want to wear flexible, tight fitting, synthetic athletic wear. Flexible to make it easy to row; tight fitting because oars have a habit of catching on loose clothing; and synthetic because you’re likely to get splashed and synthetic (or wool) stays warmer. It’s a good idea to have a high visibility outer garment to make yourself easier to spot by other boats.
During the orientation, there’ll be some extra standing around while we talk things over, so maybe bring a sweater and have a few layers at hand. Once you’re rowing regularly you’ll generate plenty of body warmth while rowing.
Footwear is an individual choice. Some rowers row barefoot, others in socks, and some in lightweight low profile shoes. Running shoes are more shoe than you need.
Racks
Important – Never allow anyone to stand underneath the racks when you are lowering or raising them.
The Maas shells are are stored on the racks. Each of the racks is color coded. To lower the boat, turn the handle counter-clockwise, and to raise the racks, turn the handles clockwise.
The racks should be returned to the raised position after you’ve taken your boat out. When you raise the racks, keep your eye on the boats. Stop as soon as you can hook the safety shackle on the eye-ring.
Preparation
Sign Out Your Boat
Sign out your boat in the logbook at the lectern by the boat shop. All rowers must sign out.
Check your Boat
- Remove shell from rack. Be careful not to scrape oarlocks on the shell below. Place the shell outside on slings
- Raise the Rack Back Up
- Inspect the boat. Close Any Bow/Stern Plugs & Porthole Cover
- Adjust Foot Stretchers (if necessary)
- Open Oarlocks
- Verify Seat Installed Correctly
Bring your Essentials
- Life Jacket(s)
- Noise Maker (Whistle, Air-horn, Kazoo)
- Phone or Radio
Select Your Oars
Shells oars have been adjusted for specific types of boats. Please refer to the chart on the wall in the boathouse besides the carbon fiber oars.
Launching the Boat
Bring your oars first down to the dock. While you’re down there, check that the dock is flush with the water. Do it during this trip, not when you carry the boat to the dock
LiteBoats can be wheeled down to the end of the dock on the dolly.
Shells can be carried on your head. It can be more comfortable if you can get the seat to rest on your head. Even better is to find an extra hand to help you carry the boat. Before you carry the boat down, double-check that no-one is actively using the dock. (There’s nothing worse than having to wait at the end of the dock with a boat on your head!) You can leave the slings out while you are rowing.
Protect the Skeg
The skeg is a particularly vulnerable part of a shell. It is highly susceptible to getting caught or knocked, which can cause expensive damage to the boat. Remember the skeg as you wheel the Liteboats down the dock. Don’t lift the bow too high. Remember the skeg when you place a boat ready for launch. Leave the skeg dangling over the end of the dock.
Getting in and out of the shells is probably the trickiest part of rowing shells at the Dolphin Club. The angle of the apron makes it more complicated than at most rowing clubs. But with some agility, care and practice, it can become second nature.
Preparing to Launch
- Lower the dock as much as possible until it is flush with the water
- Place boat at the end of the dock with the skeg hanging over the end of the dock
- Prepare the boat. Install the oars and lock the oarlocks. Make sure that the seat is sliding properly in its tracks.
- Move the boat into the water by holding the handles of the oars from the bow.
- Move the boat to the corner of the dock and extend the oars so that they fit between the gap between the piling and the pier.
Getting into the boat
Getting into the boat should also be done quickly so as to minimize the risk of damage to the boat against the dock.
The boat should be moved to the corner of the dock so the riggers are over the water, and the oars perpendicular to the dock. It’s important not to place your weight in the boat while the riggers are over the dock.
- Put one foot onto the boat while holding both oars with your outside hand.
- Bring your other foot into the footwell and sit down.
- Side or scooch onto the seat while holding the oars.
Once you’re in the boat, check for swimmers and push yourself away from the dock as soon as you can to minimize the risk of swells pushing you back onto the dock. You can tighten your footstraps away from the dock.
Rowing Technique
Shells can move very quickly. While practicing in the cove, check behind you frequently for swimmers. Avoid rowing fast until you’re outside of the cove.
If you’re coming from rowing the whitehalls, there are some rowing techniques you’ll need to be aware of:
Stability come from your oars!
Shells are less stable than the whitehalls. But stability is provided by the oars that act as outriggers. But it only works if you have your hands on the oars.
So the general rule in shells is to have one hand on the oars at all time. In this position, the boat is stable and you’ll have a hard time falling in. Let go of the oars and you’ll tip over easily.
Try it out. Use your oars for balance, and then let go. If you find yourself leaning over, pull up on the oars to right yourself. Practice this.
Feathering your oars
Feathering is the term we give for flattening the blade of the oar when you pull it out of the water for the recovery part of the stroke. Feathering reduces wind resistance on the blade, and also provides a smooth surface that is less likely to catch waves in the recovery.
But it’s pretty easy. The oars will naturally fall into their feathered position. You don’t need to lift your oars far out of the water. Just allow them to glide back just above the surface of the water. Indeed, it’s completely fine if they skim the surface of the water.
Find out more about rowing stroke from this very good video on stroke and style!
Turning
- Basic one-oared turn
- Reverse one-oared turn
- One oared turn with the other oar buried
- River Turn (Basic + Reverse)
Recovery & Put Away
The boat (and you) are at most exposed to damage while alongside the dock. Unlike other rowing clubs, the Dolphin Club has a sloping dock and the riggers can easily be broken. To avoid this, you want to exit the shell at the corner of the dock as shown in this video.
Once you land at the dock, get out of the boat and bring the boat up onto the dock before you start disassembling the oars. Pull your oar handles in, and to the bow, and then pull the boat up on the dock from the bow.
Once on the dock, take your time to remove the oars and place to the side.
If the boat feels heavy to lift, it may have taken on water. If this has happened find another hand to help you lift the boat out of the water and drain it.
Pick up the boat and walk back to the slings in the staging area, or if it’s a LiteBoat place the boat back on its dolly and wheel it back to the staging area.
Put Away
The boat will need to be rinsed down with fresh water, and put away dry.
- Hose down Boat (all surfaces) and Oars
- Remove the stern plug and drain any water that got inside. If significant water comes out, please note this in the log.
- Close and lock the oarlocks and the bailer
- Put boat away dry
- Put away Life Jacket(s), slings
- Sign Boat Back In
Please Report Problems or Damage
If you notice problems while you are out rowing, please report them in the logbook. If you damage the boat, please report this to the Boat Captain. We all make mistakes, and dings and knocks happen, but it’s not ok to walk away from it. Own up to the damage, and we’ll work together to repair it. It is also critical that the next person rowing it doesn’t take out a damaged boat.
Self Rescue
Good technique should ensure that capsizing is an unlikely event – even on the narrowest of our shells. But it’s best to be prepared, and so the highlight of shell certification will be practicing a ‘self-rescue.’
- Right the boat.
- Push oars back out and lay flat on the water.
- Hold onto oars with one hand and swim up onto the boat. It is probably easier to swing one leg over the boat and lift yourself on it, sitting with both legs hanging off the boat. You can then put your feet in the foot stretchers and ensure that your seat is sliding properly.
Rough Water
Rowing into rough water with a shell is uncomfortable and makes it harder to maintain a constant long stroke. It can often be minimized planning your course ahead of time and thinking of the wind conditions at the time when you will be in the water.
- Consider that wind blowing in the opposite direction of the currents creates larger waves.
- Waves running parallel to your rowing direction are hard to manage. For instance, expect them if you are rowing along Crissy Field, with strong North/South winds.
It is perfectly normal to have certain areas where there is almost always rough water sometimes due to underwater ridges like in Raccoon Straight or under the GG Bridge.
You should open the bailer as soon as you see that you are getting close to rough water. It is easier to do it then rather than when the shell is already full of water and you need to stop rowing to open the bailer.
In rough water you’ll probably need to shorten your stroke, raise your oars more on the recovery, and be more deliberate with getting the blades in the water before pulling.
Some good tips from OWRC – https://drive.google.com/file/d/1jwPO5Qz-A10S8oha1pqPByNs03jFB-L-/view